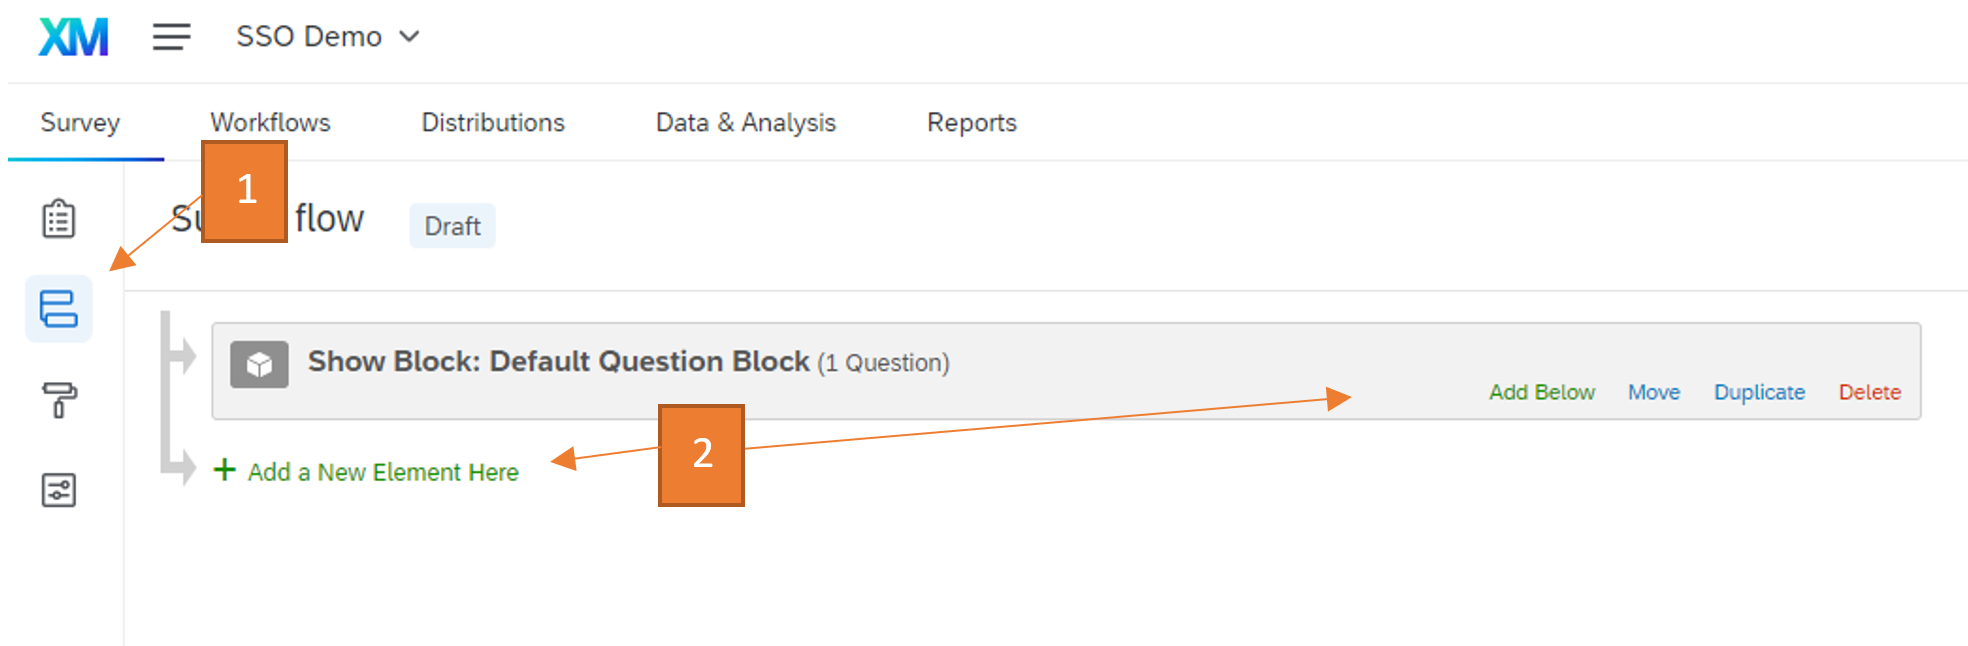
- Go to the survey form you wanted to edit and click “Survey flow”
- Click “Add a New Element Here” or “Add Below”
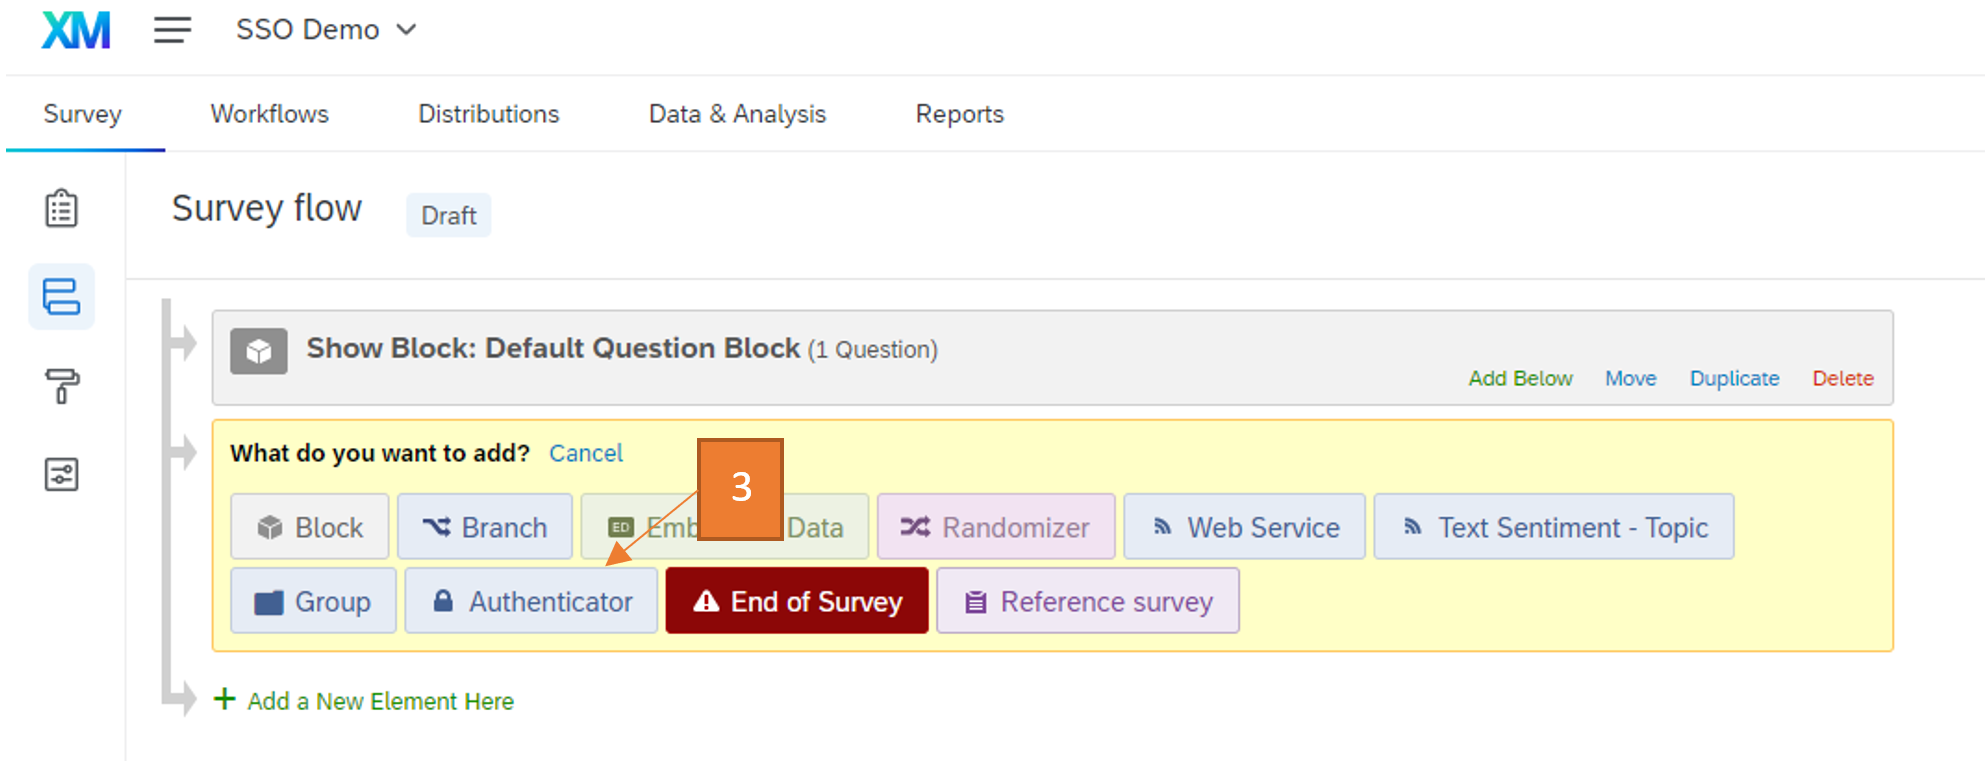
- Select “Authenticator"
- Change “Authentication Type” to SSO and “SSO Type” to “Shibboleth”
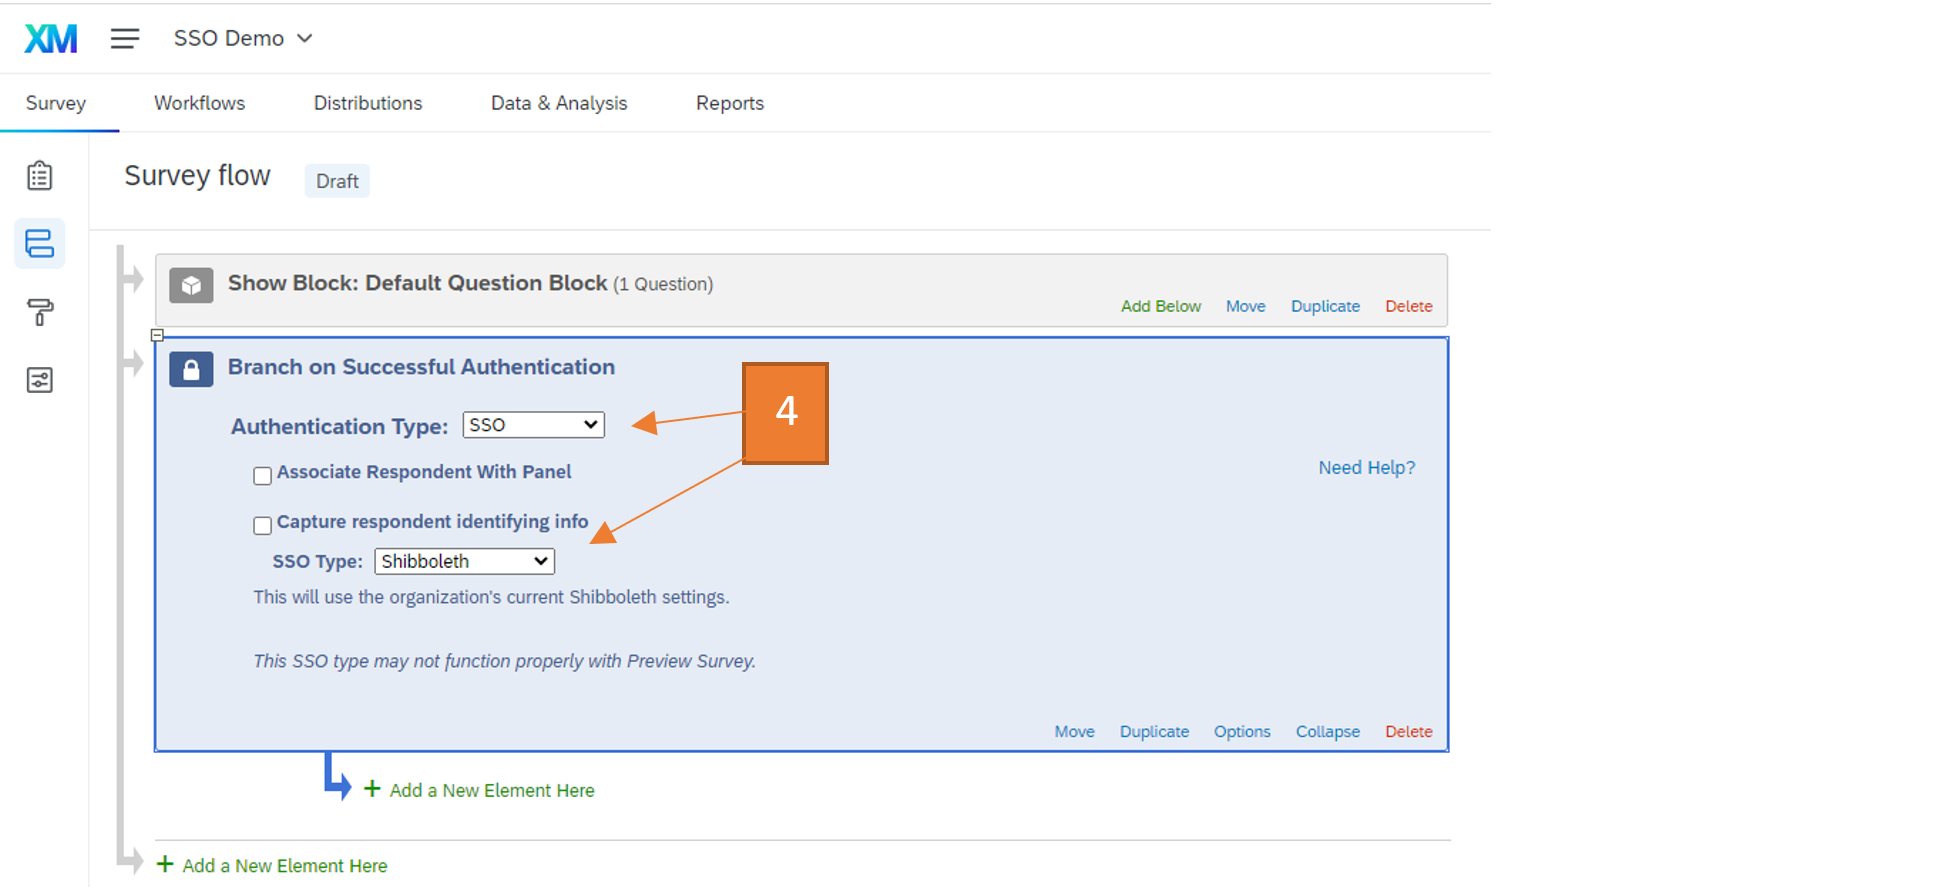
- Click and hold the “Move” button of your question block and drag the block under the authenticator

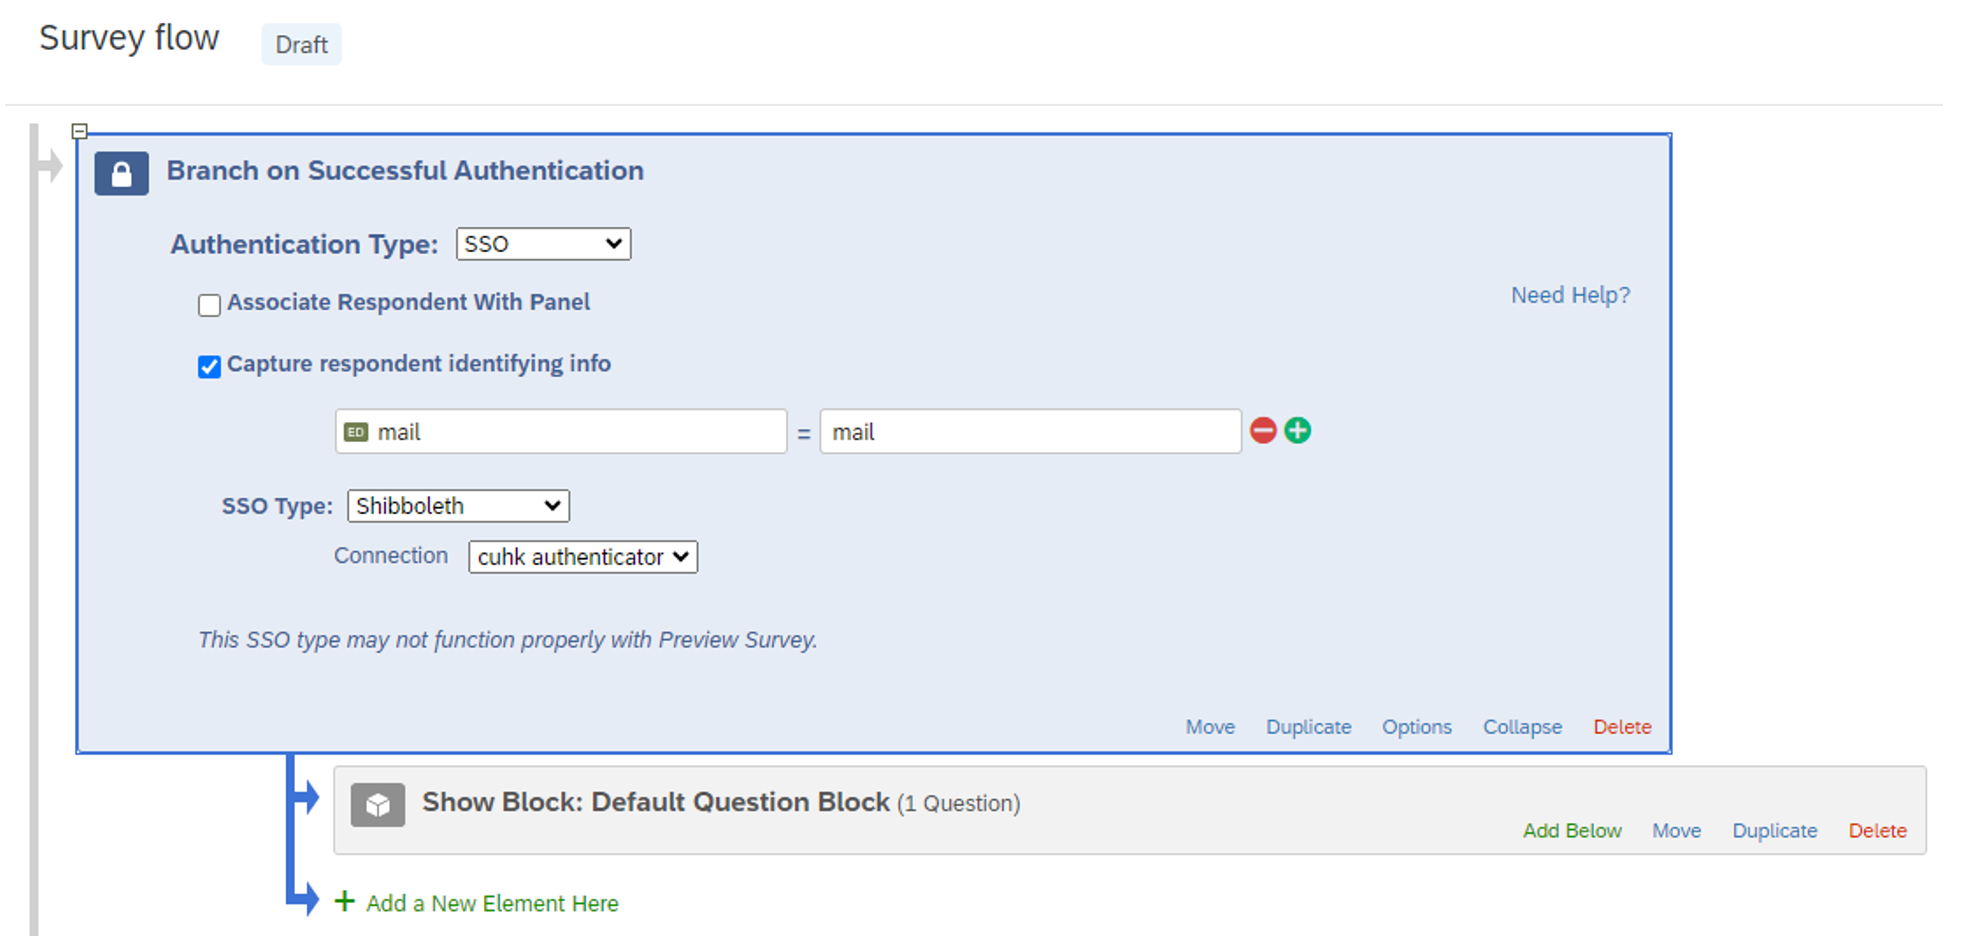
- (Optional, capture email from SSO) Enable “Capture respondent identifying info” and add the field “mail” to capture the email address of respondent from SSO. The captured data can then be viewed in the response data.
- Click “Apply” to complete the setup
- Please note that you will need to “Publish” your survey form to test/update the SSO related settings, and it may take ~5 minutes for the survey form to be updated.
- For further details, you may refer to https://www.qualtrics.com/support/survey-platform/survey-module/survey-flow/advanced-elements/authenticator/sso-authenticator/#Shibboleth


(Additional) To set up a contact list for allowing certain CUHK participants to access the survey only
Setup Contact list in Qualtrics:
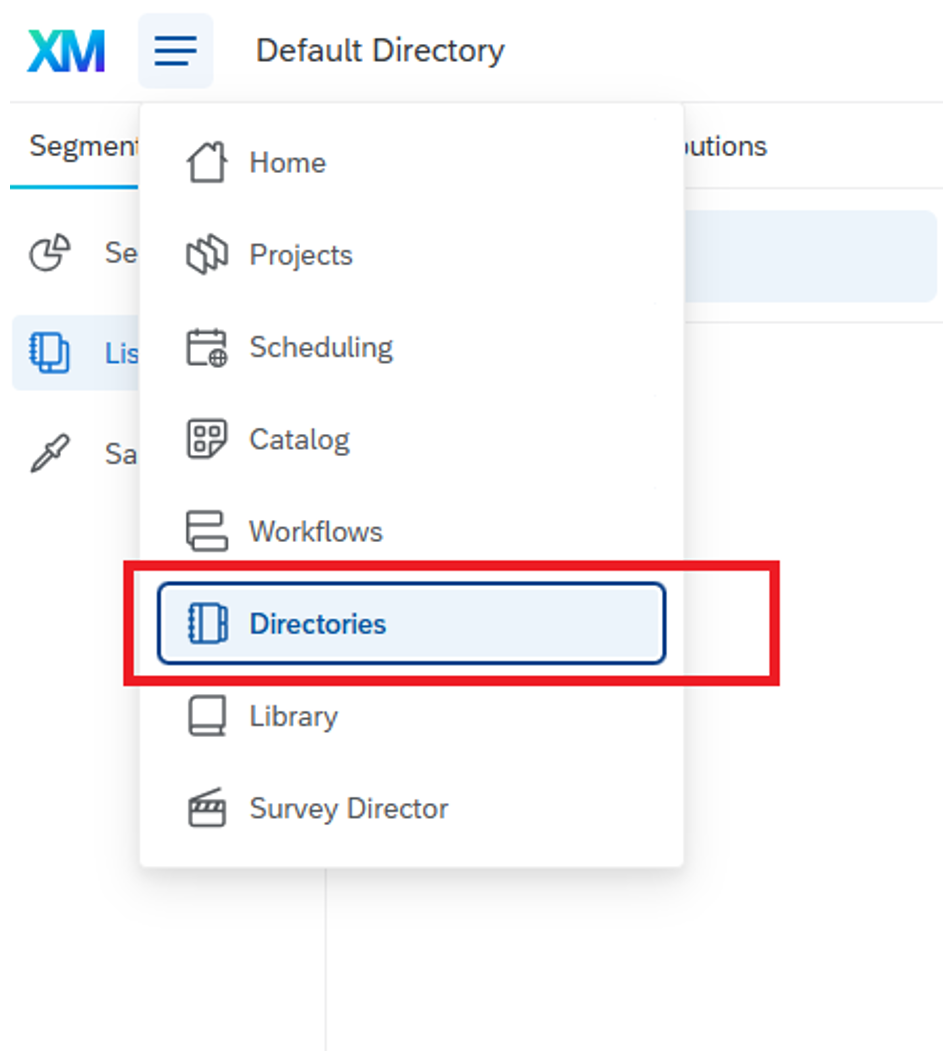
- Go to “Directories” at the menu bar
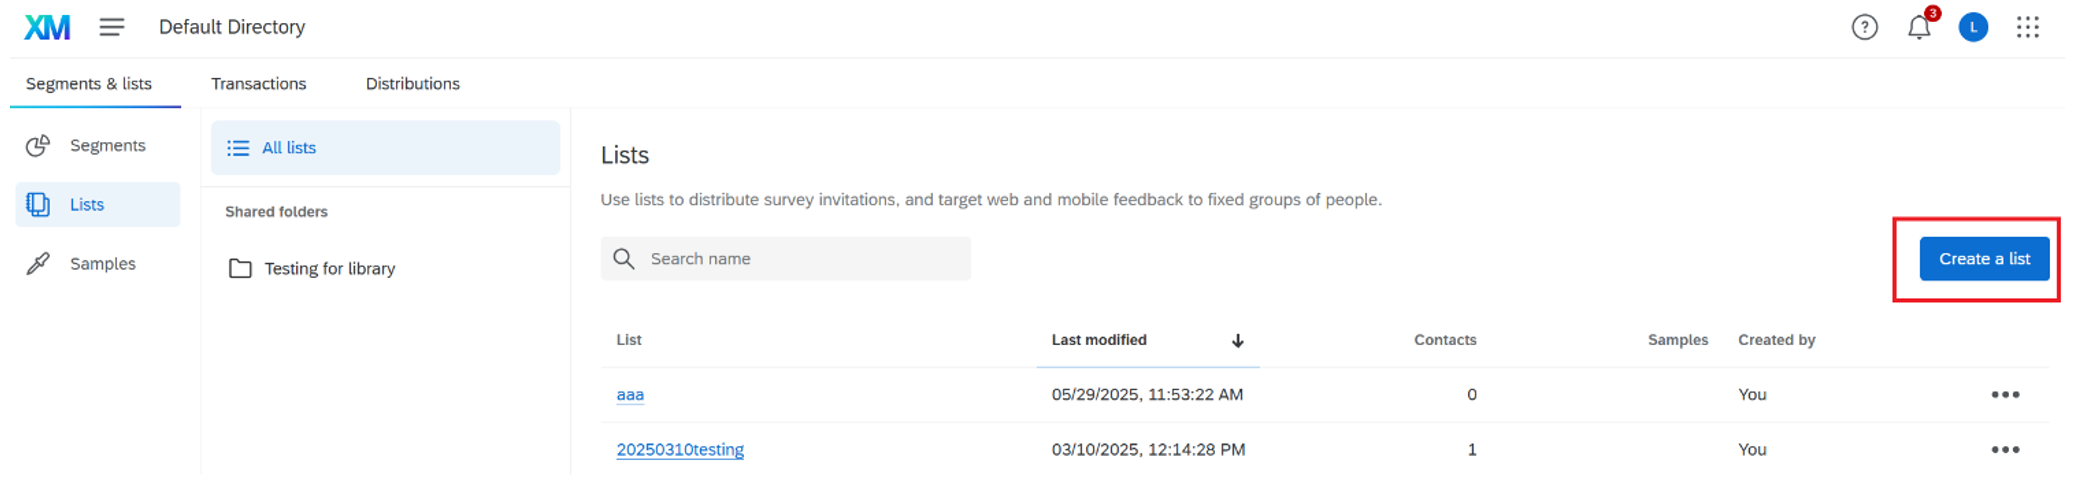
- Click “Create a list"
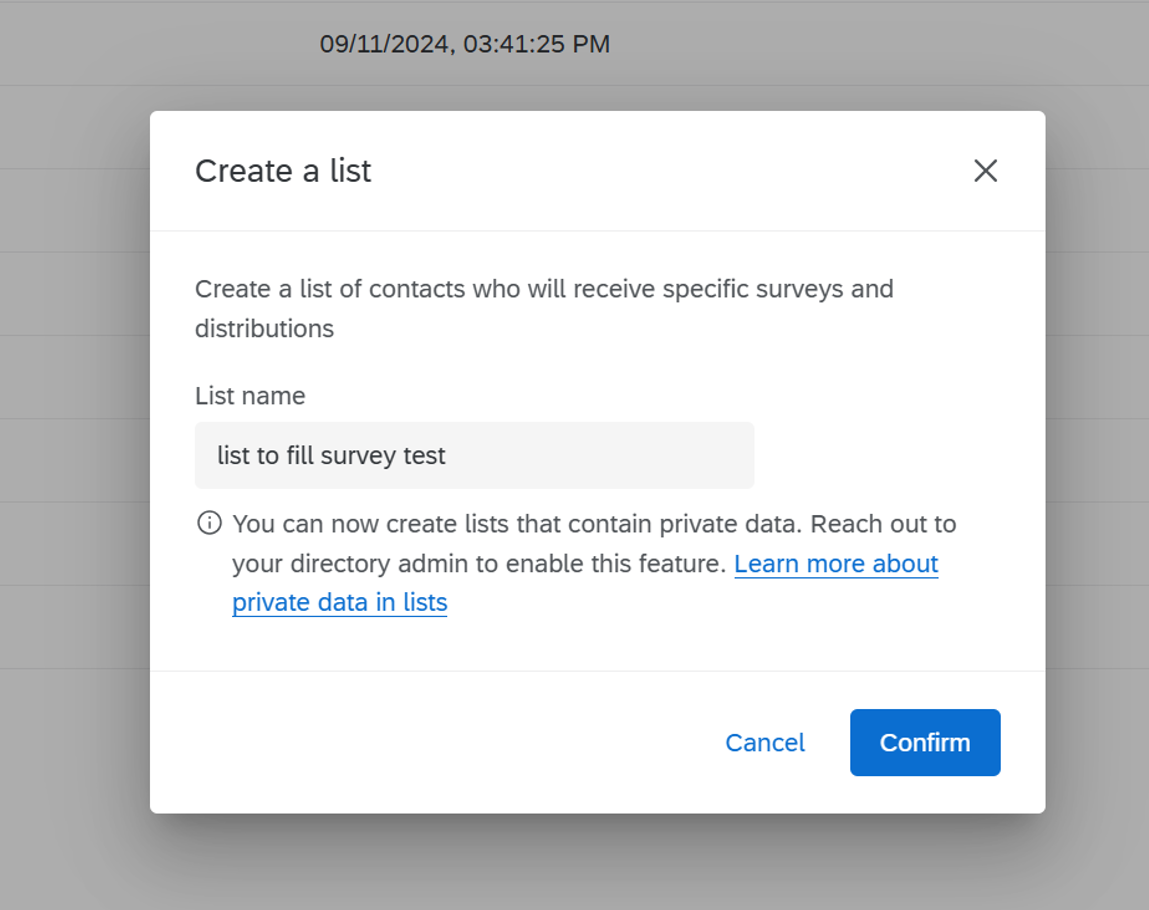
- Enter the new contact list name and click “Confirm"
- Choose a method for entering the contact information of individuals who should receive and complete the survey

- File upload: You can upload a contact list by downloading and filling out a template Excel file provided by Qualtrics. Once completed, import the file into Qualtrics to add your contacts. For details, please refer to the Qualtrics guideline: https://www.qualtrics.com/support/iq-directory/lists-tab/creating-mailing-lists/#UploadaFile
- Manual input: You can manually enter contact information directly into a table provided by Qualtrics. This method is useful for adding a small number of contacts without using a file. For details, please refer to the Qualtrics guideline:
- https://www.qualtrics.com/support/iq-directory/lists-tab/creating-mailing-lists/#ManualInput
- Please ensure that each contact’s email address is entered correctly and is a valid CUHK email address. This email will be used to match the user’s identity after they log in via CUHK OnePass.
- For further details on setting up the contact list, you may also refer to the Qualtrics guideline: https://www.qualtrics.com/support/iq-directory/lists-tab/creating-mailing-lists/#About
- Go to “Directories” at the menu bar
Survey flow setup:


- Go back to the “Survey flow” page of the survey that you would like to edit (Top left menu > Projects > Select the project > Survey flow)
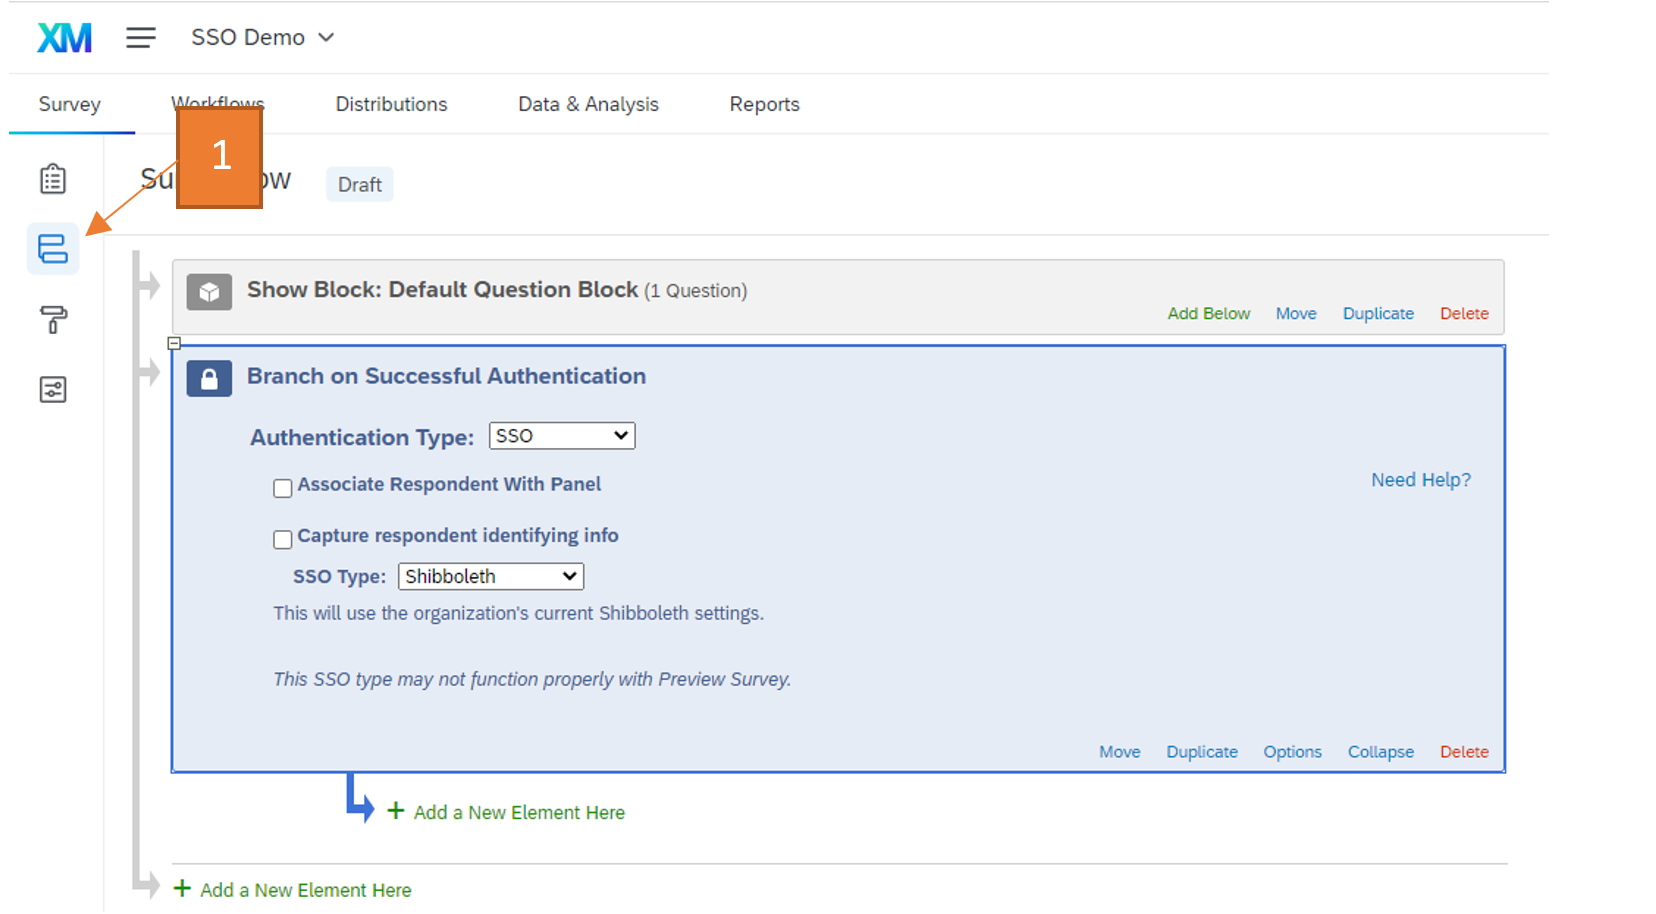
- Enable “Associate Respondent With Panel”
- Select the contact list that you created in part a
- Under “Identified By Field(s):”, select “Email"
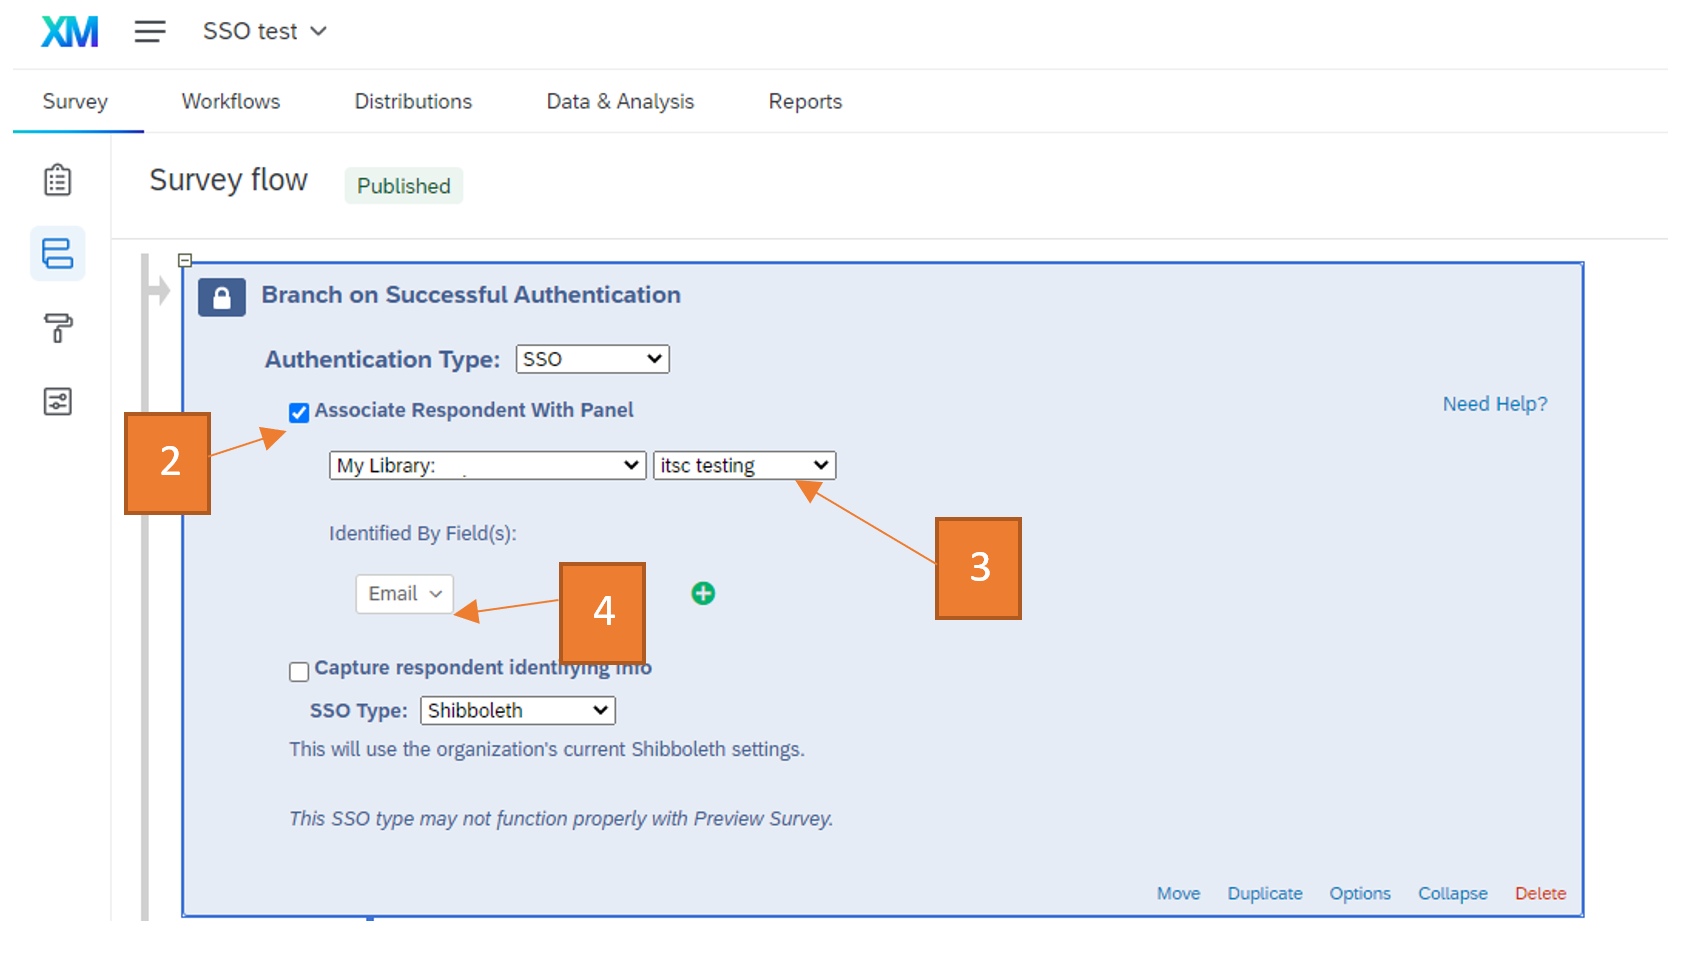
- Click “Apply” to complete the setup
- Please note that you will need to “Publish” your survey form in order to test the SSO related features.
- For further details, you may refer to the section “ASSOCIATE RESPONDENT WITH CONTACT LIST” in the following link: https://www.qualtrics.com/support/survey-platform/survey-module/survey-flow/advanced-elements/authenticator/sso-authenticator/#Shibboleth

